Fix Neck Alignment at Your Desktop Monitor: Office Guide
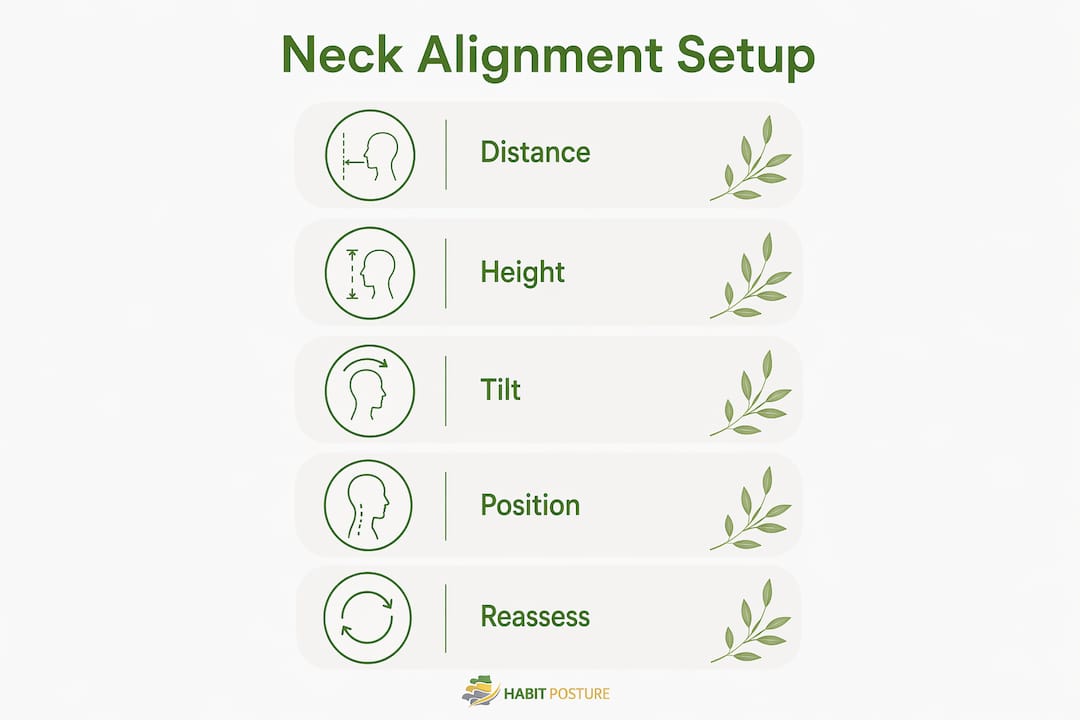
Your monitor is probably hurting your neck right now. Four quick fixes: place the screen arm’s length away (20–30 inches), set the top bezel 1–2 inches below eye level, tilt the screen 10–20° backward, and center it directly on your midline. That’s the core of proper neck alignment at a desktop monitor in an office or home setup.
Run this check before you read another word:
- Distance: Sit back naturally and stretch your arm toward the screen. Your fingertips should just graze it.
- Height: Mark your seated eye level on the wall. The top bezel should sit 1–2 inches below that mark.
- Tilt: The top of the screen leans slightly away from you, not toward you.
- Center: Your nose points straight at the middle of the screen. No turning, no leaning.
If any of those four are off, fix them now. The rest of this guide explains why they matter and how to dial in every detail.
Table of Contents
- Why your monitor position affects your neck more than you think
- How to set up a single desktop monitor for neck alignment
- How to position dual and multi-monitor setups without straining your neck
- Adjustments for glasses, height differences, and sit-stand desks
- Tools that make correct monitor positioning easy and what they cost
- Quick fixes for the most common monitor setup mistakes
- Daily habits and reassessment checks that keep your neck healthy long-term
- Key Takeaways
- What most office setups get wrong
- Habitposture products that support your neck alignment setup
- Useful sources and further reading
Why your monitor position affects your neck more than you think
Your head weighs roughly average adult head weight when balanced directly over your spine. Tilt it forward just a few inches to look at a screen that’s too low or too far away, and the effective load on your neck muscles multiplies dramatically. Hold that position for six or eight hours and you have the recipe for “tech neck,” the chronic stiffness and aching that creeps in around 2 PM and follows you home.
The goal isn’t a single perfect posture. It’s keeping your head balanced over your shoulders so your neck muscles aren’t working overtime just to hold your skull up. OSHA’s computer workstation guidance recommends a viewing distance of 20–30 inches and a downward gaze roughly 15–20° below horizontal. Those numbers aren’t arbitrary. They reflect the range where your neck stays close to neutral and your eye muscles work comfortably.
Poor placement accumulates. A monitor that’s two inches too high might feel fine at 9 AM and feel like a vice grip by 3 PM. That’s why workplace wellness posture experts consistently treat monitor height as the first variable to fix, not the last.
How to set up a single desktop monitor for neck alignment
Start seated. Sit the way you actually sit during a long call, not the way you think you should sit. That’s your real baseline.
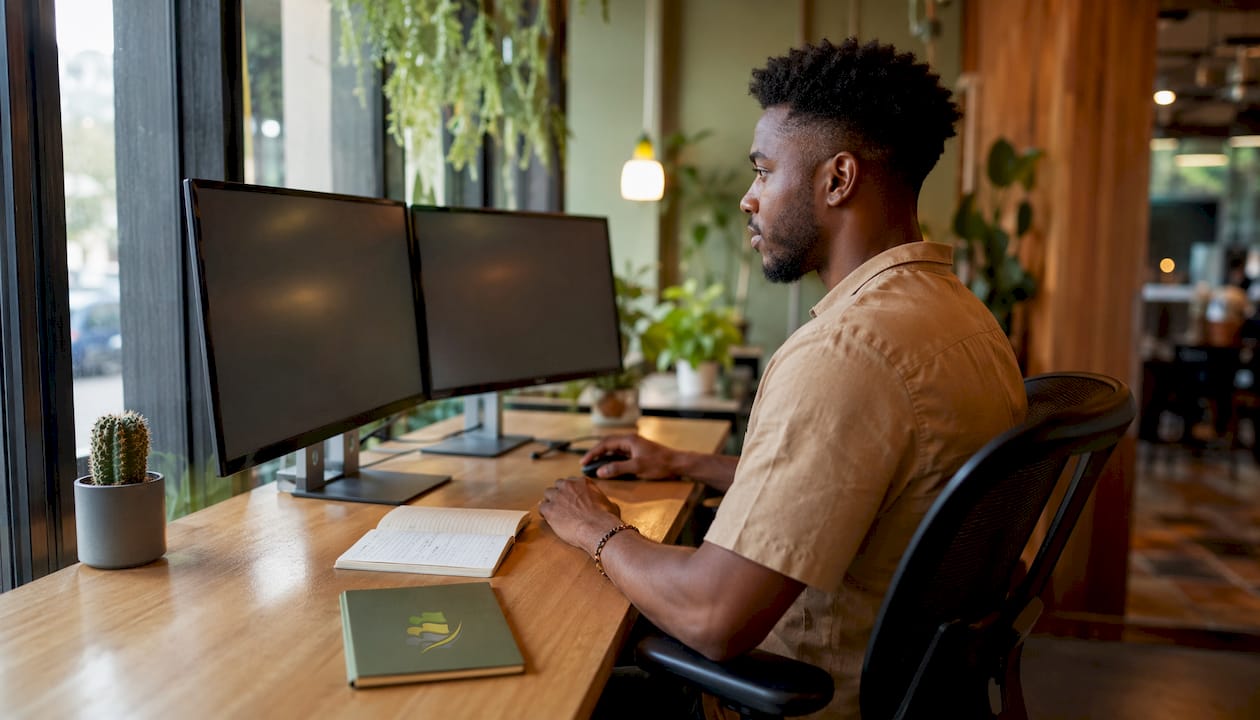
- Mark your eye level. Stick a small piece of tape on the wall at the exact height of your eyes when you’re seated naturally. This is your reference point for everything else.
- Set the top bezel. Position the top edge of your monitor 1–2 inches below that tape mark. The top-bezel rule from Ergotron’s ergonomic guidance is more reliable than the old “top of screen at eye level” advice, which tends to push the screen too high for most people.
- Set the distance. Stretch your arm forward. Your fingertips should touch the screen. That arm-stretch test lands most people in the 20–30 inch zone OSHA recommends.
- Tilt the screen. Lean the top of the monitor 10–20° away from you. Posturite’s setup guide recommends this backward tilt to reduce glare and keep your gaze angle comfortable.
- Center the monitor. Your nose should point straight at the screen’s midpoint. No rotation.
- Verify the gaze angle. Look at the center of the screen. Your eyes should be angling slightly downward, roughly 15–20° below horizontal. If you’re looking up, lower the monitor. If your chin is dropping to your chest, raise it slightly.
Supporting adjustments matter just as much as the screen itself:
- Chair height: Adjust until your elbows are at roughly 90° with your forearms parallel to the desk. This sets the foundation for everything above it. A good office chair adjustment locks in the posture baseline your monitor height depends on.
- Keyboard and mouse: Keep them close enough that your shoulders stay relaxed, not reaching forward.
- Font size: If you’re leaning in to read, the font is too small. Increase display scaling before you move the monitor closer.
Pro Tip: Make one change at a time. Move the monitor 1–2 cm or adjust tilt by 1–2° and sit with it for 20 minutes before deciding if it’s right. Small, incremental adjustments are far easier to evaluate than big repositions.
How to position dual and multi-monitor setups without straining your neck
Two monitors are twice the opportunity to wreck your neck if you set them up wrong. The core rule: your primary monitor goes directly in front of you, centered on your midline. The secondary screen angles to the side.
Key guidelines for dual setups:
- Identify your primary screen. The monitor you use more than 70% of the time is your primary. Center it on your midline and angle the secondary to the side. Consistently failing to do this is one of the most common causes of one-sided neck pain.
- Equal-use setups: If you genuinely split time 50/50, place both monitors side by side with the seam centered directly in front of your nose. CCOHS recommends a semi-circle arrangement to keep viewing distances consistent.
- Angle the secondary screen: Aim for roughly 20–30° from your primary viewing direction. Keep neck rotation under 30° where possible. Small, repeated rotations beyond 30° measurably increase muscle activity and fatigue over a full workday.
- Align the top edges: Match the top bezel heights of both monitors so your eyes don’t have to travel up or down when switching screens.
- Shallow “V” layout: Think of the two screens forming a gentle V shape, with the point of the V aimed at your nose. This keeps both screens within a comfortable arc.
Pro Tip: If you’re using an ultrawide or curved display, treat it as a single primary screen. The curved panel keeps the edges at a more consistent viewing distance, so you get the screen real estate of two monitors without the neck rotation.
Adjustments for glasses, height differences, and sit-stand desks
The standard setup rules work for most people. But if you wear progressive lenses, you’re significantly taller or shorter than average, or you use a sit-stand desk, the standard advice needs a tweak.
Progressive and bifocal lens wearers
Standard monitor height is usually too high for progressive lens users. To read through the close-vision portion of the lens, you need to look slightly downward through the bottom of the lens. If the monitor is at the typical height, you end up tilting your head back to find the right lens zone, which loads the neck in exactly the wrong direction. The fix: lower the monitor and increase the backward tilt to 30–45°. This lets you read through the correct part of the lens without neck extension.
Tall and short users
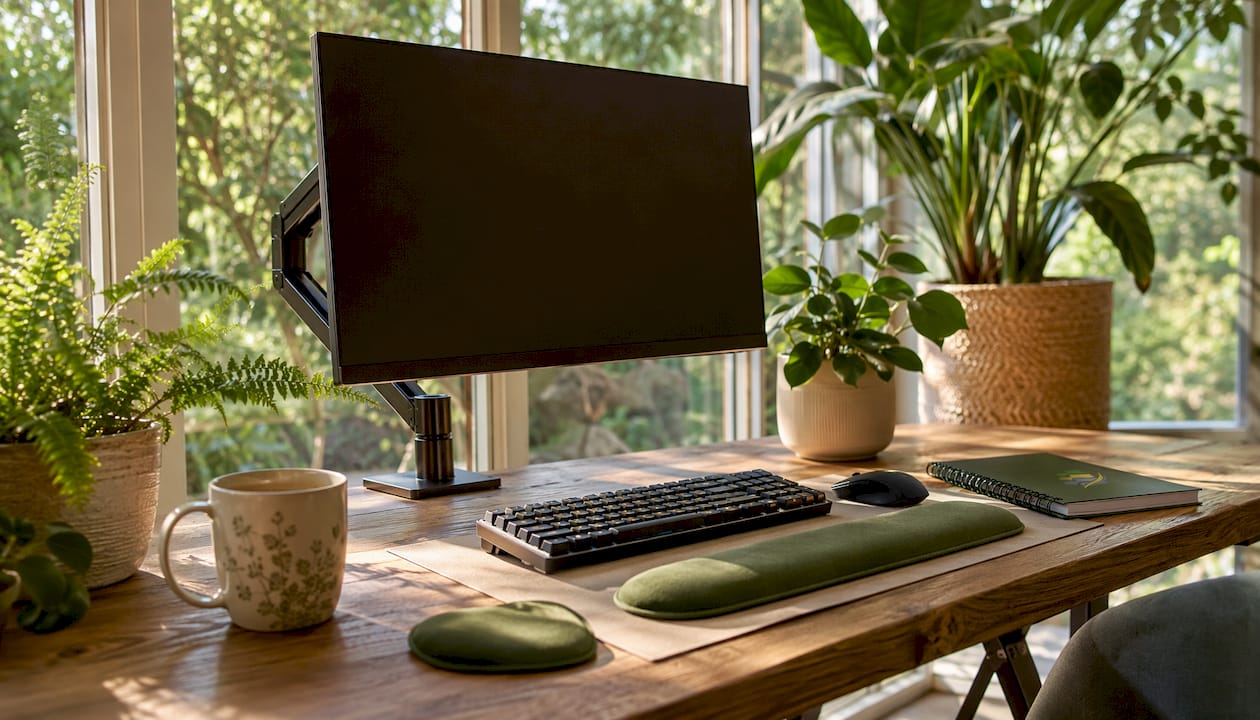
The eye-mark method works for everyone. Measure your actual seated eye height and set the top bezel 1–2 inches below it. If your desk is fixed and the monitor can’t go low enough, a monitor arm gives you the range you need. If the monitor can’t go high enough, a riser or monitor arm solves it just as well. For a posture fix in a limited space, a monitor arm is usually the most flexible single purchase.
Sit-stand desk users
When you switch from sitting to standing, raise the monitor roughly 10–15 cm to maintain the same gaze angle. Your eye level rises when you stand, and the monitor needs to follow it.
Quick testing steps for special cases:
- Sit or stand in your actual working position before measuring.
- Re-mark your eye level each time you change position significantly.
- For progressive lens users, confirm you can read the screen without tilting your head back.
- For sit-stand users, check the gaze angle in both positions before saving presets.
Pro Tip: If your sit-stand desk has memory presets, save one for sitting height and one for standing height with the monitor arm locked in. You’ll stop guessing and start switching positions consistently.
Tools that make correct monitor positioning easy and what they cost
The most impactful upgrades are a monitor arm and, for laptop users, an external keyboard and mouse. Everything else is secondary.
| Tool | What it does | Trade-offs | Typical U.S. price |
|---|---|---|---|
| Monitor arm (gas-spring) | Full height, depth, and tilt adjustment | Requires VESA-compatible monitor; takes desk space at the clamp | $40 |
| Monitor riser / stand | Raises fixed monitors to a better height | Limited adjustability; no depth or tilt control | $15–$50 |
| Sit-stand desk | Lets you alternate sitting and standing positions | Large footprint; higher cost | — |
| Laptop stand | Raises laptop screen to near-monitor height | Must pair with external keyboard/mouse | $20–$60 |
| External keyboard and mouse | Decouples input from screen for laptop users | Adds desk clutter; minor cost | — |
Buying tips:
- Monitor arms: Check VESA compatibility (most monitors use 75×75 mm or 100×100 mm patterns). Gas-spring arms are easier to reposition than fixed-tilt models. Confirm the arm’s reach matches your desk depth.
- Risers: Fine for a fixed desktop setup where height is the only issue. Not worth it if you also need depth or tilt adjustment.
- Sit-stand desks: Worth the investment if you spend more than six hours a day at a desk and want to alternate positions. Pair with a monitor arm for full flexibility.
A good desk setup for long workdays doesn’t require spending a lot. A $40 monitor arm and a $30 external keyboard solve the most common problems for laptop users. Posture-supporting accessories from Habitposture, like ergonomic back supports and posture correctors, complement these hardware fixes by keeping your body aligned even when your attention drifts from your setup.
Quick fixes for the most common monitor setup mistakes
Most neck pain from desk work traces back to five setup errors. Here’s each one and the direct fix:
- Monitor too high: Your chin tilts up to see the screen. Lower the monitor until the top bezel is 1–2 inches below eye level.
- Monitor too low: You hunch forward and down. Raise the monitor with a riser or arm, or increase the backward tilt.
- Monitor off-center: One shoulder or side of your neck aches more than the other. Center the screen on your midline.
- Monitor too close: Eye strain, headaches, and a tendency to lean back. Move it to arm’s length (20–30 inches).
- Wrong tilt: Screen tilted toward you increases glare and pushes your head forward. Tilt the top away from you, 10–20°. If you wear progressive or bifocal lenses, tilt the monitor back 30–45° and lower it for comfortable viewing.
For asymmetrical neck pain specifically, check whether any accessory is forcing rotation. A phone placed to one side, a document holder off to the right, or a secondary monitor you check constantly can all cause one-sided strain. The fix for common makeshift desk issues usually comes down to centering your most-used items.
Laptop users face a specific trap: the screen and keyboard are physically linked, so you can’t fix one without compromising the other. The only real solution is an external keyboard and mouse paired with a laptop stand or monitor arm. Correcting tech neck from monitor height always requires separating the input surface from the display.
Pro Tip: Before buying anything, try lowering the top edge of your monitor by 1–2 cm and moving the screen 2–4 inches closer or farther. These micro-adjustments cost nothing and often resolve mild discomfort within a day.
Daily habits and reassessment checks that keep your neck healthy long-term
Getting the setup right once isn’t enough. Monitors drift, chairs get adjusted by other people, and your own posture habits decay under deadline pressure. Ergonomics is a process, not a one-time fix. Periodic reassessment and task-specific adjustments are what separate people who stay comfortable from people who cycle through recurring neck pain.
A practical routine:
- Morning check (2 minutes): Before you start work, glance at the four basics: distance, height, tilt, center. If anything shifted overnight, fix it before you open your first email.
- Hourly microbreak (30–60 seconds): Stand up, roll your shoulders back, and do a quick chin tuck. Pull your chin straight back (not down) until you feel a gentle stretch at the base of your skull. Hold for five seconds. Repeat three times.
- Weekly full reassessment (5 minutes): Sit naturally, re-mark your eye level, and verify all four monitor settings. Check that your chair height still puts your elbows at 90°.
- After any furniture change: If your chair, desk, or monitor changes, treat it as a fresh setup. Don’t assume the old settings still apply.
Complementary exercises that reinforce the setup:
- Chin tucks: 3 sets of 10 reps daily. Reduces forward head posture over time.
- Scapular squeezes: Pull shoulder blades together and hold for five seconds. Do 10 reps twice a day. These exercises reduce recurrence of neck pain when paired with correct equipment setup.
For posture improvement without a gym, these two movements are enough to make a real difference when done consistently.
Pro Tip: Set a recurring 30-minute calendar reminder labeled “posture check.” It takes three seconds to glance at your setup and costs nothing. After a few weeks, the check becomes automatic.
Key Takeaways
Correct neck alignment at a desktop monitor comes down to four settings you can verify in under five minutes: distance, height, tilt, and centering.
| Point | Details |
|---|---|
| Screen distance | Keep the monitor 20–30 inches away; use the arm-stretch fingertip test to check quickly. |
| Top bezel height | Position the top edge 1–2 inches below seated eye level so your gaze angles 15–20° downward. |
| Screen tilt | Lean the top of the monitor 10–20° away from you to reduce glare and support a neutral neck angle. |
| Reassessment cadence | Run a 2-minute morning check daily and a full 5-minute reassessment weekly to catch drift early. |
| Habitposture support | Habitposture posture correctors and ergonomic supports complement monitor setup by reinforcing alignment between adjustments. |
If neck or shoulder pain persists beyond one to two weeks despite correcting your setup, or if it worsens, consult a healthcare professional. This article is general ergonomic information, not medical advice.
What most office setups get wrong
The single most common mistake I see in office and home setups isn’t a wildly wrong monitor height. It’s a monitor that’s two inches too high and two inches too close, combined with a chair that’s set too low. Each problem alone is manageable. Together, they force the head forward and up, loading the neck in two directions at once.
The fix that surprises people most: lower the monitor before you touch anything else. Most workers assume their screen is too low because they feel like they’re looking down. Usually they’re hunching forward to compensate for a screen that’s too far away, which makes the screen feel lower than it is. Move the screen closer first, then reassess the height.
Small, free adjustments consistently outperform expensive equipment when the fundamentals are wrong. A $200 monitor arm on a poorly adjusted chair is still a poorly adjusted workstation. Get the basics right, then invest in tools that make maintaining those basics easier.
Habitposture products that support your neck alignment setup
Getting your monitor position right is the foundation. Keeping your body aligned while you work is the other half of the equation.
Habitposture makes ergonomic posture correctors, adjustable back supports, and high-back chairs built specifically for people who spend long hours at a screen. These aren’t bulky medical devices. They’re wearable supports that gently remind your body to stay in the position your monitor setup is designed for, so you don’t undo good ergonomics the moment you get absorbed in a project.
Relevant products for desk workers:
- Posture correctors: Worn over the shoulders, they cue your upper back and neck to stay aligned without restricting movement.
- Adjustable back braces: Support the lumbar curve that collapses when you fatigue, keeping your whole spine in the position your monitor height assumes.
- High-back ergonomic chairs: Designed for screen-based work, with full back and neck support built in.
Browse the full range at Habitposture and find the support that fits your setup and your workday. Pair the right gear with the monitor positioning steps above, and your neck will feel the difference by end of day.
Useful sources and further reading
- OSHA: Computer workstations – components: Official U.S. workstation ergonomics specifications, including monitor distance and gaze-angle recommendations.
- CCOHS: Office ergonomics – monitor positioning: Practical guidance on primary and secondary monitor placement, including dual-monitor rules.
- Ergotron: The Ergonomic Equation: Practitioner-level setup guidance covering bezel height, progressive lens adjustments, and dynamic ergonomics.
- Posturite: Ergonomic monitor setup guide: Step-by-step setup instructions including tilt and anti-glare positioning.
- Eureka Ergonomic: Monitor height guide: Field techniques including the arm-stretch test and sit-stand height adjustments.
- Habitposture: Habit-focused posture guidance and ergonomic product recommendations for office and remote workers.