Kitchen Table Ergonomics: A Practical Guide for Homeowners
A standard kitchen or dining table sits 28–30 inches tall, pairs with a seat height of 17–19 inches, and needs 10–12 inches of clearance between the seat top and the tabletop for your elbows to rest at roughly 90 degrees. That setup works fine for a meal. For a full workday, it’s a different story. Dining furniture is built for short social use, not hours of screen time, and without a few targeted fixes, you’ll feel it in your neck and shoulders by early afternoon.
Three things you can do in five minutes right now:
- Raise your laptop screen so the top edge sits at or just below eye level (a stack of books works).
- Slide an external keyboard and mouse onto the table so your elbows stay close to 90 degrees.
- Sit on a firm cushion or adjust your chair height so your feet rest flat and your knees are roughly level with your hips.
Pro Tip: If your feet dangle after you raise your seat, add a footrest or a folded yoga mat under your feet. Dangling feet shift your weight onto your thighs and cut off circulation within 20 minutes.
These are temporary fixes. The sections below give you the exact numbers, the right accessories, and a clear checklist so you can make any kitchen table setup as comfortable as possible, for as long as you need it.
Key Takeaways
The most effective approach to kitchen table ergonomics is matching your seat height to your table height, targeting a 10–12 inch clearance, and layering the right accessories before your body starts compensating.
| Point | Details |
|---|---|
| Target clearance | Keep 10–12 inches between your seat top and tabletop for a neutral 90-degree elbow angle. |
| Table height ranges | Standard dining: 28–30 in; counter: 34–36 in; bar: 42 in, each with matching seat heights. |
| Screen before keyboard | Raise your screen to eye level first, then lower your keyboard to elbow height — always adjust both together. |
| Movement schedule | Work in 20-minute blocks with brief movement breaks; static loading accumulates whether you’re sitting or standing. |
| Habitposture support | When furniture can’t change, posture correctors and lumbar accessories from Habitposture help maintain neutral posture during kitchen table sessions. |
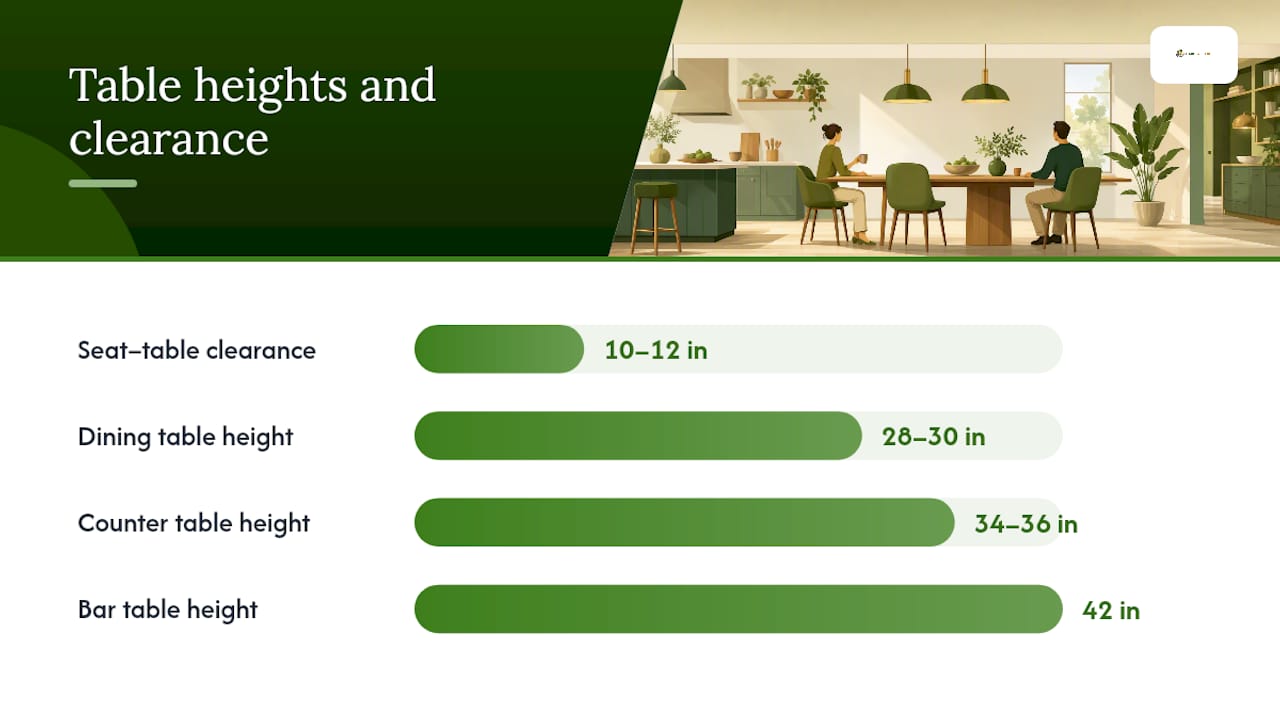
Table of Contents
- What does “kitchen table ergonomics” actually mean for your posture?
- What are the right table and chair heights for kitchen seating comfort?
- How do you set up a kitchen table as a temporary workstation?
- Which chair features and accessories help most when you can’t change the table?
- How do room layout, table shape, and lighting affect comfort?
- What adjustments work best for kids, tall or short users, and wheelchair access?
- A quick checklist to measure your setup and apply 10 fixes today
- The one mistake most homeowners make with kitchen table ergonomics
- When furniture can’t change, your posture support can
- Sources
What does “kitchen table ergonomics” actually mean for your posture?
Ergonomics is simply the practice of fitting your environment to your body, not the other way around. Applied to your kitchen or dining table, it means arranging your chair, screen, and input devices so your body stays in what ergonomists call neutral posture: neck upright, shoulders relaxed, elbows at roughly 90 degrees, and feet supported on the floor.
Mayo Clinic’s office ergonomics guidance is direct on this point: poor posture sustained over long periods is linked to musculoskeletal disorders (MSDs), including neck pain, lower-back strain, and wrist problems. The risk isn’t from one bad session. It builds up over days and weeks of the same static position.
The three most common problems at kitchen tables are tech neck (chin jutting forward as you look down at a low screen), shoulder rounding (arms reaching too far forward to type), and wrist strain (typing on a surface that’s too high). Each one is predictable, and each one is fixable with the right measurements and accessories. Understanding why working from home hurts your back starts with recognizing that most residential furniture was never designed with a screen in mind.
What are the right table and chair heights for kitchen seating comfort?
Getting the numbers right is the fastest way to improve how you feel at the table. Here’s how the three main table types break down, along with their matching seat heights and target clearances.
The 10–12 inch clearance rule holds across all three types. Homestyler’s kitchen table height guide explains it well: that gap is what lets your elbows rest near the tabletop without your shoulders hiking up or your arms reaching down. Too little clearance and your shoulders crowd upward; too much and your arms drop, pulling your upper back into a curve.
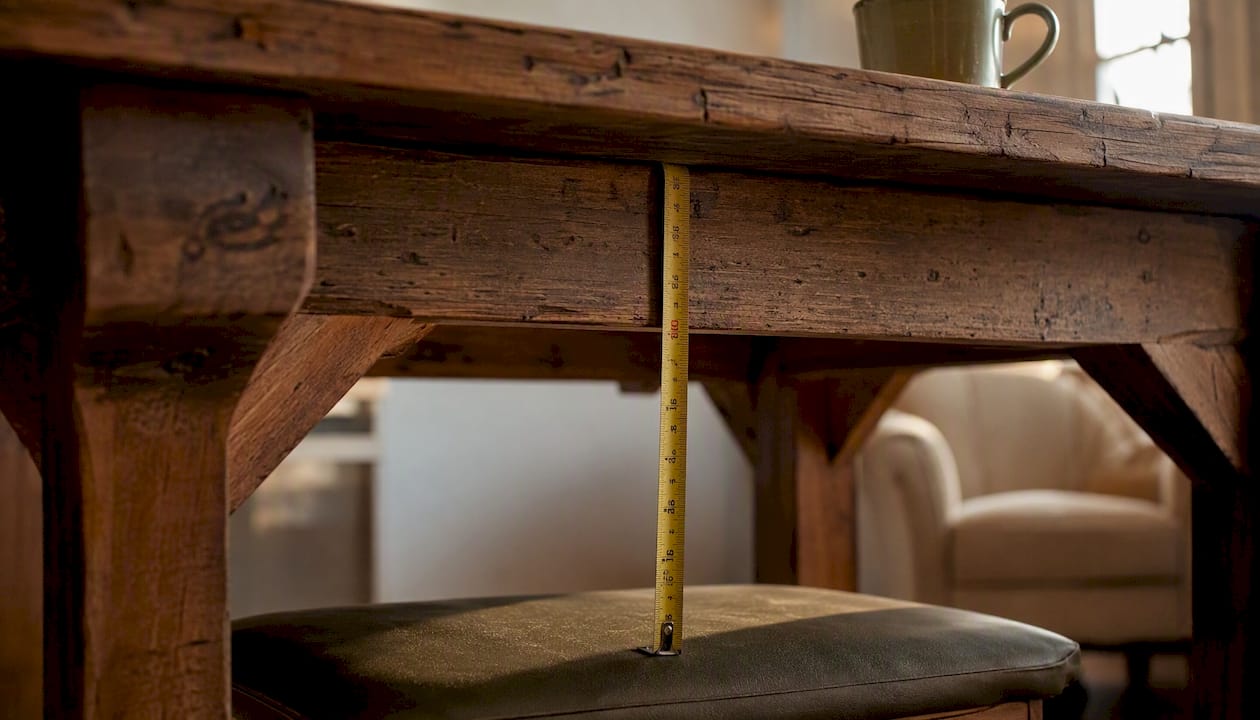
One detail most guides skip: the apron. Many dining tables have a wooden frame (the apron) running along the underside of the tabletop that can reduce usable knee clearance by a few inches. When shopping or measuring, check the apron-to-seat clearance, not just the tabletop height. You want at least 7–8 inches between the apron underside and your seat surface.
For circulation, Planner5D’s dining table height guide recommends a minimum of 36 inches of walkway clearance around the table, with 42–48 inches on high-traffic sides. Per-person width at the table should be at least 24 inches for comfortable elbow room during meals or work.
Pro Tip: If you’re 5’4" or shorter and the table feels too high, a 1–2 inch firm seat cushion raises your elbow angle into neutral without changing the furniture. If you’re 6’2" or taller, a counter-height table (34–36 in) often fits better than a standard dining table for extended work.
How do you set up a kitchen table as a temporary workstation?
The Eureka Ergonomic dining table guide frames it clearly: a dining table becomes an “unsupported” workstation the moment you add a laptop, because nothing about its height, surface, or structure was designed for screen work. The fix is layering the right accessories in the right order.
Follow these steps to set up your kitchen table for screen work:
- Set your seat height first. Sit with your feet flat on the floor (or on a footrest) and your knees at roughly 90–110 degrees. This is your foundation.
- Check your elbow angle. Rest your arms naturally at your sides. Your elbows should land at or just above tabletop height. If the table is too high, add a seat cushion. If it’s too low, a keyboard tray can drop your input devices to the right level.
- Raise your screen. Place your laptop on a monitor riser or a firm stack of books so the top of the screen is at or just below eye level. Never raise the screen without also lowering your input devices.
- Add an external keyboard and mouse. Typing on a raised laptop keyboard is one of the fastest routes to shoulder strain. A separate keyboard placed at elbow height solves it.
- Support your lower back. A lumbar roll or compact lumbar cushion behind your lower back keeps your spine from collapsing into a C-curve over time.
- Set a movement schedule. A practical rule: work for 20 minutes, stand or move for 8, and do 2 minutes of light stretching. Static loading, whether sitting or standing, accumulates. Standing all day is not the answer; movement is.
Accessory checklist for a kitchen table workstation:
- Monitor riser or laptop stand
- External keyboard and mouse
- Lumbar cushion or lumbar roll
- Adjustable footrest (or a firm, flat substitute)
- Clamp-on monitor arm (for permanent setups)
- Pull-out keyboard tray (for tables with aprons or fixed heights)
For more detailed setup examples, the desk setup ergonomics guide at Habitposture walks through real configurations you can adapt to a kitchen table.
Pro Tip: Raising your laptop screen without lowering your keyboard is a common mistake. It relieves neck strain but creates shoulder and wrist strain instead. Always adjust both together.
Which chair features and accessories help most when you can’t change the table?
When the table is fixed, the chair and accessories carry the ergonomic load. Most dining chairs are designed to look good, not to support you through a four-hour work session. Here’s what to prioritize.
- Seat height matters most. A chair that lets you sit with feet flat and knees at 90 degrees is the starting point. If your current chair is too low, a firm 1–2 inch cushion is the cheapest fix.
- Firm, slightly contoured seats outperform soft cushions for long sessions. A seat that’s too soft lets your pelvis tilt backward, which collapses your lumbar curve and loads your lower back.
- Lumbar support is non-negotiable for sessions over 30 minutes. A compact lumbar roll placed at the curve of your lower back keeps your spine in its natural S-shape. Most dining chairs offer none.
- High-back ergonomic chairs are the best option for extended work at any table. They support the full length of your spine and reduce the muscle effort needed to stay upright. Understanding why home office chairs fail often comes down to this: most residential chairs support neither the lumbar nor the thoracic spine.
- Footrests become necessary when a seat cushion raises you enough that your feet no longer reach the floor. An adjustable footrest keeps your lower legs supported and prevents thigh pressure that cuts circulation.
The FIRA Kitchen Layout Design Guide reinforces this: where a single fixed height won’t suit all users, adjustable solutions are the practical answer. Cushions, footrests, and keyboard trays are the residential version of that principle.
Pro Tip: Never raise your seat height to compensate for a high table without also adding a footrest. Dangling feet are worse for your posture than a slightly high table.
How do room layout, table shape, and lighting affect comfort?
The physical setup of the room shapes how comfortable the table feels, even before anyone sits down.
Table shape trade-offs:
- Rectangular tables maximize seating capacity and work surface but create corner hazards and limit circulation in tight rooms.
- Round and oval tables improve sightlines for conversation, eliminate sharp corners (useful with children), and allow easier circulation in smaller kitchens. The trade-off is less usable edge space per person.
- Pedestal and trestle bases are worth considering for ergonomic setups: they eliminate the center leg that blocks knee clearance and make it easier to seat people of varying heights comfortably.
Lighting for dining and task work:
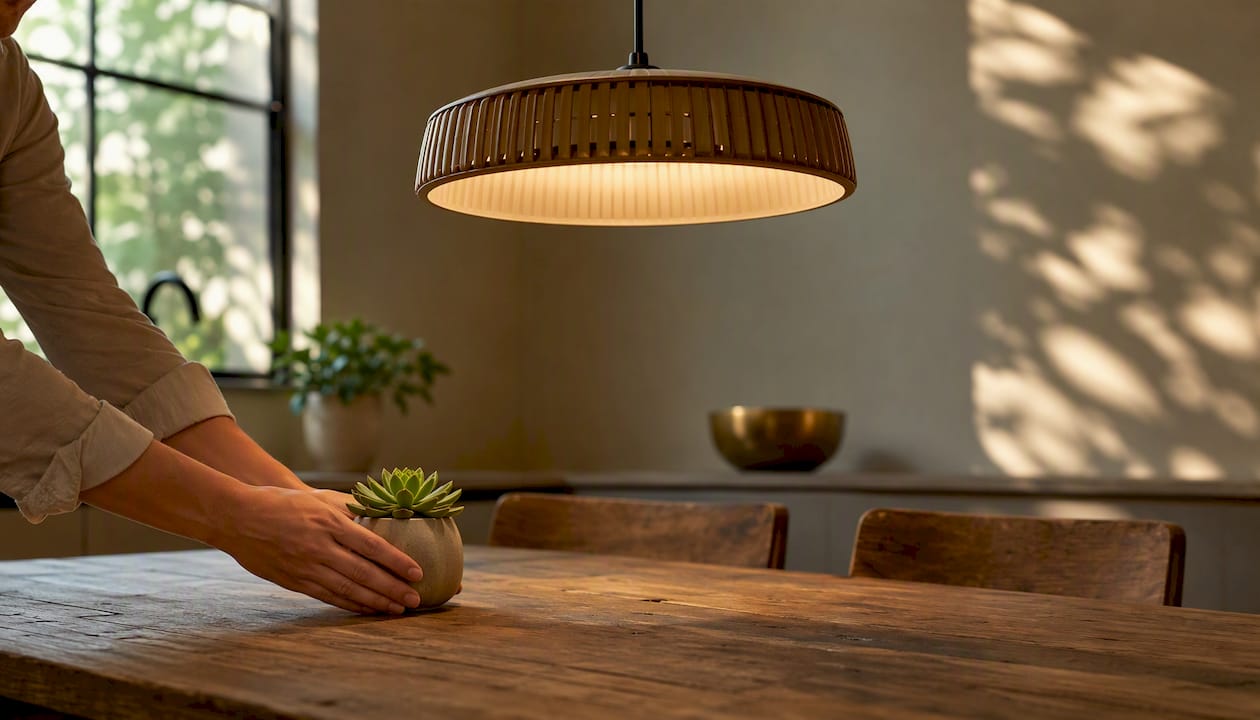
Good lighting reduces eye strain and the forward head lean that comes from squinting at a dim screen or document. IES task guidance suggests roughly 200–300 lux for general dining and 300–500 lux for focused table work. Pendant fixtures are the most common kitchen table lighting choice. Position the bottom of the pendant 28–34 inches above the tabletop: low enough to illuminate the surface without glare, high enough not to obstruct sightlines across the table.
| Use case | Target lux range | Pendant bottom height above tabletop |
|---|---|---|
| General dining | 200–300 lux | 28–34 in |
| Task/detail work | 300–500 lux | 28–34 in |
FIRA’s guidance on kitchen design emphasizes that reach and line-of-sight are as important as surface height when designing a functional kitchen work area. The same principle applies to lighting: if you have to lean forward to see clearly, the light is wrong, not your posture.
What adjustments work best for kids, tall or short users, and wheelchair access?
Most ergonomic guidance is written for adults of average height. Here’s how to adapt for the people who fall outside that range.
Children:
- Standard-height tables (28–30 in) with booster seats work better than child-sized furniture for shared family use.
- Round or oval shapes reduce bump hazards from sharp corners.
- Children’s feet should rest on a footrest or booster step, not dangle.
Very tall users (6’2" and above):
- A counter-height table (34–36 in) often provides a more natural elbow angle than a standard dining table.
- Check knee clearance carefully: tall users need more underside depth.
Very short users (5’2" and below):
- A 1–2 inch firm seat cushion raises elbow height without changing the table.
- A footrest is almost always necessary after adding a cushion.
Wheelchair accessibility:
Accessibility guidance recommends a minimum clear knee height of 27 inches under the tabletop, a minimum clear width of 30 inches, and a minimum clear depth of 19 inches. Pedestal-base tables are the most practical choice here because they eliminate the leg obstruction that standard four-leg tables create.
Pro Tip: Before buying a table for a mixed-use household, measure the seated elbow height of your tallest and shortest regular users. The gap between those two numbers tells you whether a single table height can work or whether you need an adjustable solution.
A quick checklist to measure your setup and apply 10 fixes today
Run through these steps with a tape measure. It takes about five minutes and tells you exactly what to change.
Measurement steps:
- Measure your tabletop height from the floor to the surface.
- Measure your seat height from the floor to the top of the seat cushion.
- Subtract seat height from tabletop height. The result should be 10–12 inches.
- Sit in your normal working position and check your elbow angle. Arms should rest near 90 degrees without your shoulders rising.
- Check apron clearance: measure from the underside of the table frame to your seat. You want at least 7–8 inches.
10 quick fixes, ranked by impact:
- Add a lumbar cushion or lumbar roll behind your lower back.
- Place your laptop on a riser so the top of the screen is at eye level.
- Add an external keyboard and mouse at elbow height.
- Swap to a firm seat cushion if your chair is too low.
- Add a footrest if your feet don’t reach the floor after adjusting your seat.
- Improve lighting: add a desk lamp or raise pendant brightness to reduce squinting.
- Move your chair closer to the table so you’re not reaching forward.
- Set a 20-minute movement timer and stand or walk briefly each cycle.
- Swap your dining chair for a high-back ergonomic chair if sessions exceed two hours regularly.
- If none of the above fixes the elbow angle, consider a pull-out keyboard tray or a counter-height table.
When the fixes stop working, the table is the problem. A standard dining table used for full workdays is a common makeshift desk posture issue that accessories can only partially solve. At that point, a dedicated ergonomic workstation is the right investment.
The one mistake most homeowners make with kitchen table ergonomics
Most people focus on the chair. They buy a cushion, maybe a lumbar roll, and call it done. The chair matters, but the screen is where the real damage happens.
When your laptop sits flat on the table, the screen is typically 8–12 inches below eye level. That angle pulls your head forward. For every inch your head moves forward of your shoulders, the effective load on your cervical spine roughly doubles. You don’t feel it immediately, which is exactly why it’s so easy to ignore until the neck pain becomes a daily problem.
The fix is counterintuitive: raise the screen first, then lower the keyboard. Most people do the opposite, or raise the screen and keep typing on the laptop keyboard, which trades neck strain for shoulder strain. Both screen and input height need to move together. That’s the single adjustment that changes everything else downstream, including how your shoulders sit, how your lower back loads, and how long you can work before fatigue sets in.
The other underrated factor is the table’s apron. A thick apron cuts knee clearance and forces you to sit further back from the table, which increases the reach distance to your keyboard and pulls your shoulders forward. If your table has a deep apron and you’re experiencing shoulder tension, measuring that underside clearance is worth doing before you buy any other accessory.
When furniture can’t change, your posture support can
Not every homeowner can swap out a dining table or buy a dedicated office chair. The good news: the right posture support gear closes most of the gap.
Habitposture’s lineup is built for exactly this situation: people working long hours at non-ideal surfaces who need practical, wearable support that works alongside their existing setup. A posture corrector worn during your kitchen table sessions trains your shoulders and upper back to hold the right position even when the chair isn’t helping. Pair it with a lumbar cushion and a monitor riser, and you’ve addressed the three biggest strain points without replacing a single piece of furniture.
Check sizing carefully before ordering. The right fit is what makes posture support gear actually work. Browse the ergonomic accessories guide at Habitposture for setup recommendations, then visit Habitposture to find the right support for your setup.
Sources
- Kitchen Layout Design Guide (FIRA PDF)
- FIRA (Furniture Industry Research Association)
- Office ergonomics (Mayo Clinic)
- Choosing the Perfect Kitchen Table Height (Homestyler)
- Standard dining table height guide (Planner5D)
- Dining table office ergonomics guide (Eureka Ergonomic)