Hip Flexor Relief for Seated Gamers: Product Setups That Work
The fastest way to get hip flexor relief during seated gaming is a three-part product setup: a chair with a dynamic or flexible seat pan, a supportive wedge or memory-foam cushion, and a percussion device for post-session recovery. Together, these reduce static hip flexion, promote pelvic micro-movement, and ease the tightness that builds after hours in the same position. Start with the seat pan and cushion, then add a percussion tool. The setup checklist below shows you exactly how to configure each piece.
Key Takeaways
The most effective approach to hip flexor relief during seated gaming combines a dynamic or flexible seat pan, a supportive cushion, a posture corrector, and a percussion device, configured with the 1-inch seat-depth rule and hourly movement breaks.
| Point | Details |
|---|---|
| Dynamic seat pan first | Flexible or multiaxial seat pans improve hip and lumbar angles by up to ~15.3° versus flat seats. |
| Apply the 1-inch rule | Leave about 1 inch between the seat edge and the back of your knee to prevent thigh pressure and hip discomfort. |
| Use percussion safely | Keep each spot to 20 seconds or less; up to 1–2 minutes across a full muscle group, avoiding bony areas. |
| Move every hour | Standing and moving for 2 minutes per hour offsets tightness that products alone cannot fully prevent. |
| Habitposture bundle | Posture corrector, seat cushion, and percussion device available at habitposture.com for a complete setup. |
Table of Contents
- Which product categories actually reduce hip-flexor tightness for seated gamers
- How do you choose the right ergonomic product for your body and gaming style?
- What does the research say about dynamic seating and pelvic mobility?
- Quick recommended product bundles by gamer profile
- How to set up your products so they actually relieve hip-flexor tension
- Typical price ranges and where to buy in the U.S.
- What I’ve learned testing setups for long gaming sessions
- Habitposture’s bundle for seated hip-flexor relief
- Primary sources and further reading
- Sources
Which product categories actually reduce hip-flexor tightness for seated gamers
Not every ergonomic product targets hip flexors. These five categories do.
- Dynamic or flexible-seat chairs. A chair with a multiaxial or segmented seat pan lets your pelvis shift slightly as you play, reducing prolonged hip flexion. Research on a four-segment flexible seat pan found hip and lumbar angle improvements compared to a conventional flat seat, along with a more favorable muscle-fatigue profile in longer testing. That kind of pelvic freedom is what separates a genuinely ergonomic gaming chair from a standard bucket seat.
- Wedge and memory-foam seat cushions. A wedge cushion tilts the pelvis slightly forward, reducing hip flexion angle without requiring a new chair. Memory-foam variants distribute pressure more evenly across the sit bones, which helps when you’re in the same spot for a multi-hour session.
- Posture correctors and lumbar supports. A posture corrector worn across the upper back cues your shoulders back and prevents the forward collapse that pulls your pelvis into a posterior tilt, which indirectly loads the hip flexors. Habitposture’s adjustable posture correctors are built for exactly this kind of screen-based use.
- Percussion and massage devices. A massage gun applied to the hip flexor and surrounding muscle groups before or after a session can reduce local muscle tension and temporarily increase range of motion. Physical therapy guidance recommends keeping application to no more than 20 seconds on a single spot and up to 1–2 minutes across a full muscle group.
- Footrests and monitor-ergonomics accessories. A footrest keeps your feet flat and your knees at roughly 90°, which takes pressure off the back of the thighs and reduces the hip flexion angle. Monitor arms that bring the screen to eye level prevent the forward head lean that cascades down into hip and lumbar tension.
This guide focuses on products, not physical therapy or exercise programs. If you’re dealing with acute or severe hip pain, see a clinician first.
How do you choose the right ergonomic product for your body and gaming style?
Prioritize adjustability, a flexible or multiaxial seat pan, seat depth compliance with the 1-inch rule, and solid lumbar support. Those four features do more for hip-flexor comfort than any marketing claim about “gamer-grade” materials.
Here’s a practical checklist to run through before you buy:
- Seat depth. Ergonomic guidance recommends leaving about 1 inch between the seat edge and the back of your knee. Too deep and the seat edge presses into your thighs, restricting circulation and worsening hip discomfort.
- Seat pan mobility. Can the seat pan tilt or flex? A rigid flat pan locks your pelvis in one position. Look for tilt range specs or a multiaxial pivot mechanism.
- Lumbar support adjustability. Height-adjustable lumbar support lets you position the curve at your natural lordosis, not a fixed point that may sit too low or too high for your torso.
- Cushion firmness. Softer isn’t always better. A cushion that bottoms out under your weight offers no tilt benefit. Look for medium-firm memory foam or a wedge with a defined angle (typically 5–10°).
- Weight rating and height range. Confirm the chair or cushion is rated for your weight and that the seat height adjustment covers your leg length.
- Warranty and support. Entry-level products often carry 90-day warranties. Mid-range and premium options typically offer 1–3 years. Longer warranties signal better build quality.
Price expectations by tier:
- Entry ($30–$80): Basic wedge cushions, simple lumbar rolls, entry percussion devices with limited speed settings.
- Mid ($80–$250): Memory-foam wedge cushions, adjustable lumbar supports, posture correctors, mid-range percussion guns with multiple attachments.
- Premium ($250–$600+): High-back ergonomic gaming chairs with flexible or multiaxial seat pans, integrated lumbar systems, and full height/tilt adjustability.
Pro Tip: Test pelvic freedom before committing to any chair or cushion. Sit with feet flat and back relaxed, then try to shift your pelvis forward and back a few degrees. If you can’t move without effort, the seat pan or cushion is restricting you. That restriction is exactly what you’re trying to fix.
What does the research say about dynamic seating and pelvic mobility?
Controlled studies consistently show that chairs allowing pelvic micro-movement improve hip and lumbar angles, reduce post-session fatigue, and lower perceived low-back discomfort compared with standard flat-seat designs.
- A small study of 17 healthy adults found a dynamic balance chair increased pelvic movement during a 30-minute task and was associated with significantly lower post-work lumbar fatigue versus a standard office chair.
- The four-segment flexible seat pan study reported reductions in low-frequency muscle-fatigue bands during longer testing, alongside the ~15.3° hip and lumbar angle improvement noted above.
- Laboratory data on a multiaxial seat pan showed reduced calf swelling, increased seat-pan movement, and lower perceived transient low-back pain during a 2-hour seated task versus a standard chair.
- A systematic review of ergonomic chairs found consistent comfort and biomechanical improvements, though pain-reduction outcomes were mixed across studies.
Key finding: Dynamic and flexible seat pans improve pelvic movement and reduce post-session fatigue in short-to-medium duration tasks. Pain elimination is not guaranteed, but comfort and biomechanical outcomes are consistently better than standard flat seats.
Most of these studies used healthy adults in controlled lab settings, not multi-hour gaming sessions. The signal is coherent and consistent, but real-world results vary by body type, session length, and setup quality.
Quick recommended product bundles by gamer profile
Pick the profile that fits you, then build the bundle.
- Casual gamer (1–3 hours/day). A medium-firm wedge cushion on your existing chair plus a posture corrector from Habitposture covers most of the hip-flexor load at entry cost. Add a basic percussion device for post-session use. Skip the premium chair upgrade until you’ve confirmed the cushion alone isn’t enough.
- Marathon gamer or streamer (4+ hours/day). A high-back ergonomic chair with a flexible or multiaxial seat pan is worth the investment here. Pair it with a Habitposture lumbar support and a mid-range percussion gun with a flat or ball attachment for the hip flexor area. A footrest rounds out the setup if your feet don’t sit flat.
- Competitive or ergonomics-first gamer. Go premium on the chair (flexible seat pan, full tilt/height adjustability, integrated lumbar). Add Habitposture’s posture corrector for shoulder and upper-back alignment, a wedge cushion for additional anterior pelvic tilt, and a percussion device for warm-up and recovery. A monitor arm to hit eye-level screen height completes the picture.
- Budget-first setup. A wedge cushion ($30–$50) plus a posture corrector is the highest-impact, lowest-cost starting point. Avoid rigid flat seats with no tilt option and extremely deep seat pans you can’t adjust, both of which lock the pelvis and worsen hip flexor tension over time.
How to set up your products so they actually relieve hip-flexor tension
Proper seat depth, lumbar placement, and seat pan mobility are the three setup items that matter most. Get those right before worrying about anything else.
- Set seat height so your feet rest flat on the floor (or footrest) and your knees are at roughly 90°.
- Apply the 1-inch rule. Slide forward until there’s about 1 inch of space between the seat edge and the back of your knee. Adjust seat depth if your chair allows it.
- Position lumbar support at the natural inward curve of your lower back, not at the belt line. You should feel gentle contact, not pressure.
- Test pelvic freedom. With feet flat and back relaxed, shift your pelvis forward and back a few degrees. Movement should feel easy. If it doesn’t, adjust the cushion angle or seat pan tilt.
- Set monitor height so the top of the screen is at or just below eye level. This prevents forward head lean, which pulls the whole spine out of alignment.
- Add a footrest if your feet don’t sit flat after step 1.
- Use your percussion device on the hip flexor area for up to 1–2 minutes per muscle group before or after a session, keeping each spot to 20 seconds or less. Avoid bony areas like the hip bone itself.
Break cadence: Stand and move for at least 2 minutes every hour. Clinicians note that adults who sit 8+ hours daily accumulate hip-flexor tightness that no single product fully offsets without regular movement.
Pro Tip: Set a phone timer for 55 minutes when you start a session. When it goes off, stand, walk to the kitchen, and come back. That one habit compounds faster than any gear upgrade.
If you experience sharp or persistent hip pain, stop and consult a clinician before continuing.
Typical price ranges and where to buy in the U.S.
Here’s what to expect to pay across the main product categories:
- Ergonomic gaming chairs (flexible/dynamic seat pan): $250–$600+ for quality options with genuine seat-pan mobility and full adjustability.
- Wedge and memory-foam seat cushions: $30–$100 depending on foam density and wedge angle.
- Posture correctors and lumbar supports: $25–$80 for adjustable, screen-use-focused designs.
- Percussion devices: $50–$300 depending on motor power, attachment variety, and battery life.
- Footrests: $20–$60 for adjustable-angle models.
Price differences within each category come down to seat-pan technology, materials quality, warranty length, and whether lumbar support is integrated or add-on. A $400 chair with a genuine multiaxial seat pan delivers meaningfully different pelvic mobility than a $150 chair with a fixed bucket seat, regardless of how both are marketed.
For Habitposture’s full range of posture correctors, lumbar supports, and recovery devices, visit Habitposture.
What I’ve learned testing setups for long gaming sessions
The conventional wisdom says “just get a better chair.” After working through dozens of setups with long-session gamers and desk workers, the chair matters, but it’s rarely the whole answer on its own.
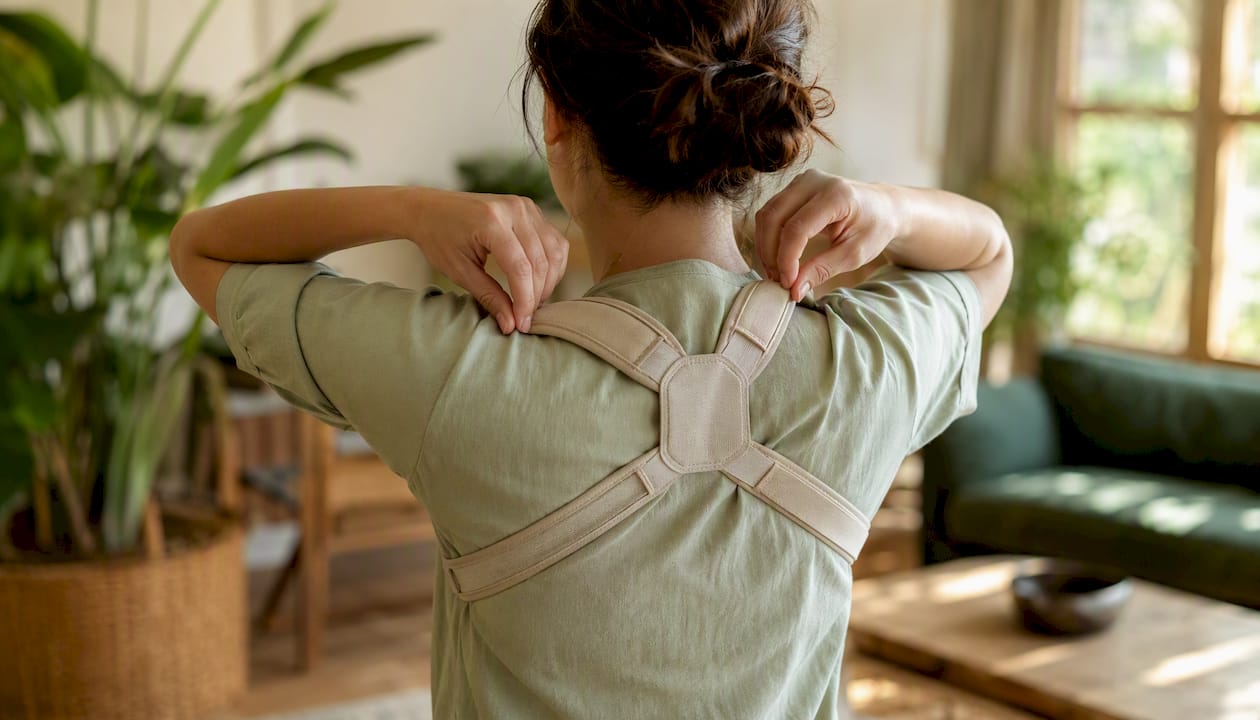
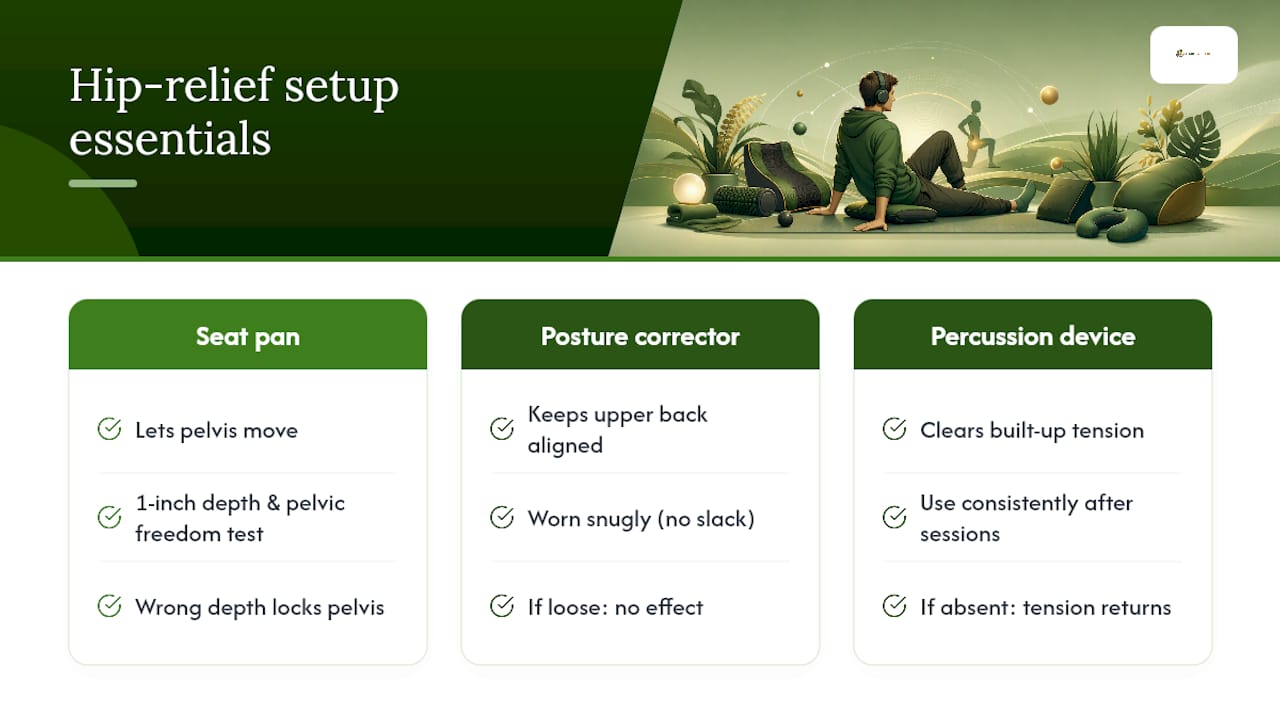
The setups that actually deliver hip pain relief from sitting combine three things: a seat that lets the pelvis move, a posture corrector that keeps the upper back from collapsing forward, and a percussion device used consistently after sessions. Remove any one of those, and the other two underdeliver. The chair keeps you mobile. The posture corrector keeps the chain aligned. The percussion device clears the tension that builds up anyway.
The other thing most guides miss: setup errors negate good products. A premium chair adjusted to the wrong seat depth still locks your pelvis. A posture corrector worn too loosely does nothing. The 1-inch rule and the pelvic freedom test in this article exist because the product is only as good as the configuration. Habitposture’s gear is built to work in real-life setups, not lab conditions, and the ergonomics of your full gaming setup determines how much of that benefit you actually feel.
Habitposture’s bundle for seated hip-flexor relief
Habitposture offers a tested combination of posture support, cushioning, and percussion recovery designed for gamers and screen workers who need real hip-flexor relief, not a generic wellness kit.
The bundle pairs an adjustable posture corrector (shoulder and upper-back alignment), a supportive seat cushion (anterior pelvic tilt and reduced hip flexion), and a percussion device (post-session muscle tension relief) into one setup you can configure in under 10 minutes. Every piece is built for screen-based lifestyles: durable enough for daily use, low-profile enough to wear or use without interrupting your session.
Visit Habitposture to see the full catalog and pick the bundle that fits your setup and budget.
Primary sources and further reading
- An ergonomic design and evaluation of a chair with a flexible seat pan for the maintenance of correct sitting posture — Controlled study (30 participants short-term, 20 long-term) measuring hip/lumbar angle improvements and muscle-fatigue profiles with a four-segment flexible seat pan.
- Dynamic balance chair study (PMC4932051) — Small trial (17 adults) comparing pelvic movement and post-work lumbar fatigue between a dynamic balance chair and a standard office chair.
- Multiaxial seat pan dynamic sitting study (ScienceDirect) — Laboratory study measuring calf swelling, seat-pan movement, and perceived low-back pain during a 2-hour seated task with a multiaxial versus standard seat pan.
- How to use a massage gun: A physical therapist’s guide (Hinge Health) — Clinician-authored guidance on safe percussion device application, timing, and attachment selection.
- Ergonomics exercises and seat-fit guidance (Arizona Pain) — Practical ergonomic seat-fit protocol including the 1-inch rule for seat depth and hip-pressure prevention.
Sources
- An ergonomic design and evaluation of a chair with a flexible seat pan for the maintenance of correct sitting posture
- Dynamic balance chair study (PMC4932051)
- Multiaxial seat pan dynamic sitting study (ScienceDirect)
- How to use a massage gun: A physical therapist’s guide
- Ergonomics exercises and seat-fit guidance