Desk Setup Ergonomics Examples for Long Workdays
Desk setup ergonomics is the practice of arranging your furniture and tools to keep your body in a neutral, comfortable position that reduces strain during long hours of screen use. The goal is not perfection. It is building a workspace that fits your body, not one your body has to fight against. Done right, ergonomic desk design reduces neck ache, shoulder tension, and lower back pain before they become daily problems. The examples below give you specific, measurable adjustments you can make today.
1. Desk setup ergonomics examples: where to start
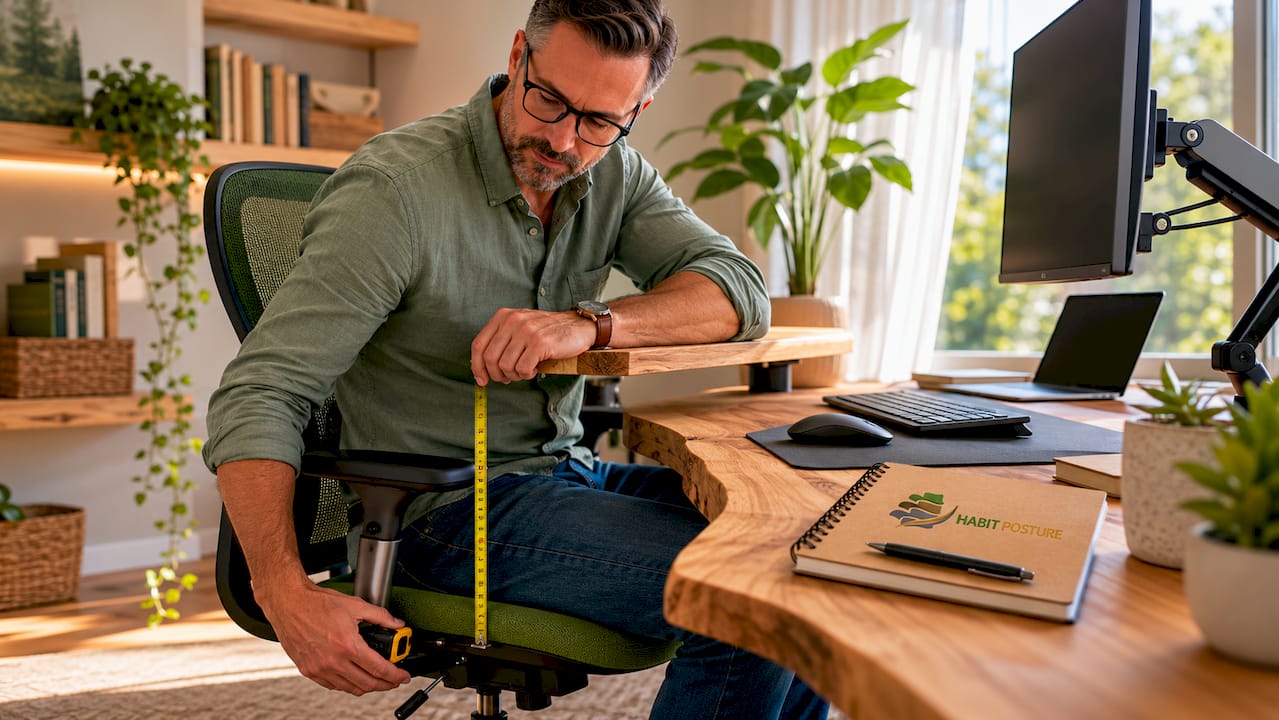
The single most important principle in any ergonomic setup is to use your body as the reference point, not the furniture. Most people adjust their body to fit the desk. The correct approach is the opposite. Start with your chair height, then set the desk, monitor, and keyboard to match.
This body-first sequence matters because every measurement flows from a single anchor: the height of your elbows when your arms hang relaxed at your sides. Get that one number right and the rest of the setup falls into place quickly.
2. How to set chair height and desk height correctly
Chair height sets the foundation for every other ergonomic adjustment you make. Raise or lower the seat until your elbows sit at roughly 90° while typing, your feet rest flat on the floor, and your thighs are parallel to the ground. If your feet dangle after raising the seat, add a footrest.
Once your chair is set, adjust the desk height to meet your hands at that same relaxed elbow level. A desk that is too high forces your shoulders to shrug. A desk that is too low pulls your neck and upper back into a forward curve. Both patterns cause pain within weeks.
Key chair and desk adjustments to check:
- Seat height: elbows at 90°, feet flat, thighs level
- Lumbar support: positioned at the natural curve of your lower back, not the mid-back
- Seat depth: two to three finger-widths of space between the seat edge and the back of your knees
- Armrests: set low enough that your shoulders stay relaxed, not raised
- Desk surface: level with your relaxed elbow height after the chair is set
Pro Tip: Sit back fully in your chair before measuring anything. Perching on the edge is one of the most common setup errors, and it throws off every other measurement.
3. Monitor placement examples to reduce neck and eye strain
Monitor height and distance are the two most misunderstood elements of a healthy desk arrangement. The top of your screen should sit at or slightly below eye level, so your gaze angles slightly downward. This keeps your neck in a neutral position instead of craning upward or dropping forward.
Distance matters just as much as height. Place the monitor approximately one arm’s length away, which translates to roughly 50–70 cm from your eyes. Sitting closer forces your eyes to work harder and encourages you to lean in, which rounds your upper back over time.
Practical monitor placement steps:
- Sit back in your fully adjusted chair.
- Extend one arm forward. Your fingertips should nearly touch the screen.
- Check that the top bezel of the monitor aligns with or sits just below your eye level.
- Tilt the screen back 10–20 degrees to match your natural downward gaze angle.
- Position the monitor perpendicular to windows to cut glare. Glare causes eye fatigue even when posture is otherwise correct.
For dual monitor setups, place both screens side by side at the same height. Center the gap between them directly in front of you if you use both equally. If one screen is primary, center that one and angle the secondary screen inward at about 30 degrees.
Pro Tip: A monitor arm is one of the best investments for any desk. It lets you dial in height, depth, and tilt in seconds, and it frees up desk space at the same time.
4. Keyboard and mouse positioning examples and tips
Keyboard and mouse placement directly controls wrist and shoulder strain. Keep your wrists straight and neutral while typing. Avoid bending them upward, downward, or to either side. Any sustained bend in the wrist increases pressure on the tendons and nerves running through the carpal tunnel.
The mouse belongs right next to the keyboard, at the same height. Reaching forward or to the side to grab the mouse is one of the fastest ways to develop shoulder and neck tension. Keep both input devices close to your body.
Specific positioning tips:
- Keyboard position: centered to your body, not offset to one side
- Keyboard tilt: flat or slightly negative tilt (front edge slightly higher than back) to keep wrists neutral
- Mouse placement: immediately beside the keyboard, no gap
- Keyboard trays: useful when the desk is too high; they drop the keyboard below desk level to match elbow height
- Compact keyboards: removing the number pad brings the mouse closer to your body and reduces shoulder reach
- Ergonomic mice: vertical mice keep the forearm in a handshake position, which reduces forearm rotation strain
Avoid resting your wrists on the desk while actively typing. Wrist rests are for pausing between bursts of typing, not for use during keystrokes.
5. Supportive accessories: footrests, stands, and ergonomic tools
Ergonomic accessories fill the gaps that furniture alone cannot cover. A footrest is the clearest example. When you raise your chair to get your elbows at the right height, your feet may no longer reach the floor. A footrest restores proper foot support without forcing you to lower the seat and compromise your arm position.
| Accessory | Problem it solves | Example use case |
|---|---|---|
| Footrest | Feet dangle after raising chair | Short desk workers with fixed-height desks |
| Monitor stand or arm | Screen too low on flat desk | Raising a laptop or monitor to eye level |
| Lumbar cushion | Chair lacks lower back support | Adding support to a standard office chair |
| External keyboard and mouse | Laptop screen and keyboard at same height | Laptop-only setups that fail ergonomic standards |
| Anti-glare screen filter | Overhead lighting causes screen glare | Open-plan offices with fluorescent lights |
Laptop setups deserve special attention. A laptop screen and keyboard share the same device, which means you cannot raise the screen to eye level without also raising the keyboard too high. The fix is a laptop stand combined with an external keyboard and mouse. Raising the screen without adjusting the input devices can actually worsen wrist posture while improving neck position.
Sit-stand desks add another layer of benefit. Alternating between sitting and standing every 30–60 minutes reduces lower limb fatigue and back load compared to staying in one position all day. Standing all day is not the goal. Variety is.
6. Practical checklists and daily habits to maintain your setup
A good ergonomic setup degrades without maintenance. Chairs get bumped. Monitors get nudged. You start perching forward without noticing. A quick daily check takes less than 30 seconds and catches these small shifts before they become painful habits.
The measurement-first checklist sequence runs in this order:
- Chair: seat height, lumbar support position, armrest height
- Desk: surface at relaxed elbow height
- Monitor: top of screen at or below eye level, one arm’s length away
- Keyboard and mouse: wrists neutral, mouse beside keyboard
- Footrest: feet fully supported if needed
Beyond the physical setup, the 20-20-20 rule protects your eyes during long screen sessions. Every 20 minutes, look at something 20 feet away for 20 seconds. One study found this practice reduced computer vision syndrome from 100% of participants to 41.9% over three weeks. The benefit fades when people stop using reminders, so set a recurring timer.
Pro Tip: Combine your eye break with a quick posture reset. Stand up, roll your shoulders back, and check that your lower back is against the lumbar support. Thirty seconds every 20 minutes adds up to a significant reduction in daily strain.
Key takeaways
A properly configured ergonomic desk setup requires body-referenced measurements for chair, monitor, keyboard, and accessories to reduce strain during long workdays.
| Point | Details |
|---|---|
| Start with chair height | Set elbows at 90° first, then adjust everything else to match. |
| Monitor at eye level | Top of screen at or below eye level, 50–70 cm away, perpendicular to windows. |
| Wrists stay neutral | Keep keyboard flat and mouse beside it to prevent wrist and shoulder strain. |
| Accessories fill the gaps | Footrests, laptop stands, and lumbar cushions solve problems furniture alone cannot. |
| Daily 30-second checks | Small daily resets prevent gradual setup drift that causes pain over weeks. |
What I’ve learned after years of watching people set up their desks wrong
Most people treat ergonomics as a one-time event. They spend an afternoon adjusting everything, feel better for a week, and then slowly drift back to their old habits. The chair gets lowered. The monitor gets pushed back. The mouse ends up six inches farther from the keyboard than it should be. Pain returns and they blame the chair.
The real problem is that ergonomics is not a setup. It is a posture habit for professionals. The physical adjustments matter enormously, but they only hold if you build the daily habit of checking and resetting them.
The other mistake I see constantly is ignoring glare. People spend money on a quality chair and monitor arm, then sit with a window directly behind their screen. The resulting glare causes eye fatigue that feels like headaches and general tiredness. Positioning your monitor perpendicular to the window costs nothing and makes a bigger difference than most people expect.
My honest recommendation: start with the chair. Get your elbow angle right. Everything else follows from that one measurement. Then build the 30-second daily check into your routine before you open your first app of the day. Small, consistent adjustments beat a perfect setup that you forget about.
— Thomas
Habitposture has the gear to back up your setup
Long workdays demand more than a checklist. They demand equipment and habits that work together. Habitposture builds posture support gear for people who spend 8+ hours at a screen, whether that is a standing desk, a gaming chair, or a kitchen table turned home office.
If you are ready to move beyond adjustments and into real support, explore Habitposture’s full range of posture and ergonomic gear. From lumbar support to posture correction tools, the products are built for real workdays, not ideal conditions. You can also read more about why desk professionals need posture gear to understand which tools make the biggest difference for your specific setup.
FAQ
What is desk setup ergonomics?
Desk setup ergonomics is the practice of positioning your chair, desk, monitor, and input devices to keep your body in a neutral posture that reduces strain. The goal is to fit the workspace to your body, not the other way around.
What is a desk ergonomics assessment?
A desk ergonomics assessment evaluates how well your current workstation fits your body, checking chair height, monitor position, keyboard placement, and lighting. It identifies adjustments needed to reduce injury risk and improve comfort during long work sessions.
How high should my monitor be for ergonomic desk use?
The top of your monitor should sit at or slightly below eye level, with the screen approximately 50–70 cm from your eyes. This keeps your neck in a neutral position and reduces downward or upward strain.
Do I need special equipment for an ergonomic desk setup?
Basic ergonomic setups require only a height-adjustable chair and a monitor at the correct height. Accessories like footrests, monitor arms, and external keyboards become necessary when your existing furniture cannot reach the correct measurements for your body.
How often should I check my ergonomic desk setup?
A quick 30-second check at the start of each workday catches gradual drift in chair height, monitor position, and keyboard placement. Combining this check with the 20-20-20 eye break rule every 20 minutes maintains both posture and eye comfort throughout the day.